Monster Theme Birthday Party on a Budget

One of the many parties I’ve had the pleasure of planning since Covid appeared and I disappeared was this fun Monster Theme Birthday Party. Inexpensive and super fun!

Monster Theme Birthday Party | mamasbrush #monsterparty #birthdayparty #boybirthdayparty #monsters #eventplanning #partyplanning

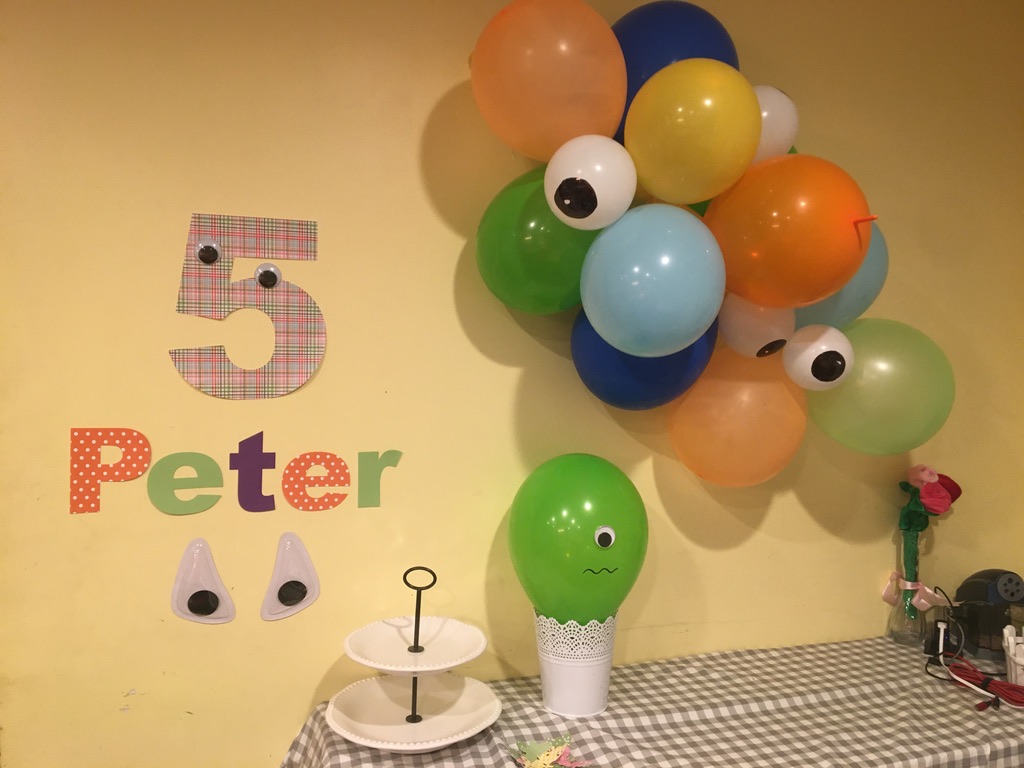
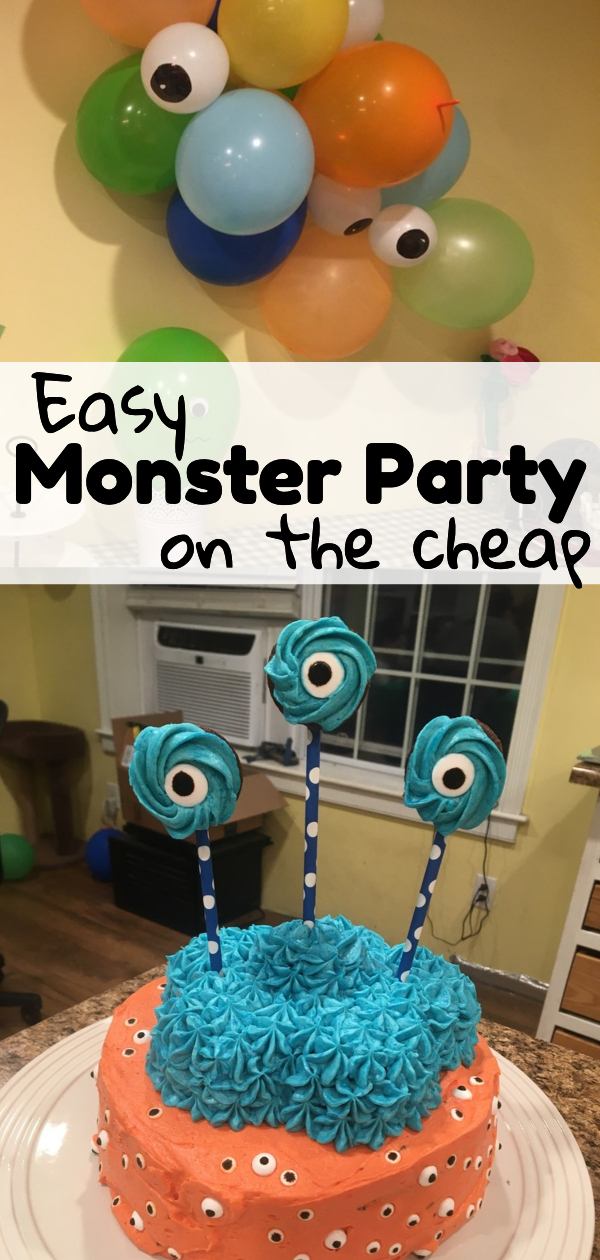
It was a casual at home family party, shutdown style, but the little details made it special to the little monster we were celebrating. I tied together balloons into great bunches and incorporated white ones into the mix as eyes, with black “pupils” colored with sharpie. Black circles of paper would also work.

I used my Cricut to cut out the number 5 and letters of his name. If you don’t have a Cricut, scissors and scrapbook paper (or any paper for that matter) would work just as well.

Monster Theme Birthday Party | mamasbrush #monsterparty #birthdayparty #boybirthdayparty #monsters #eventplanning #partyplanning #chalkboard

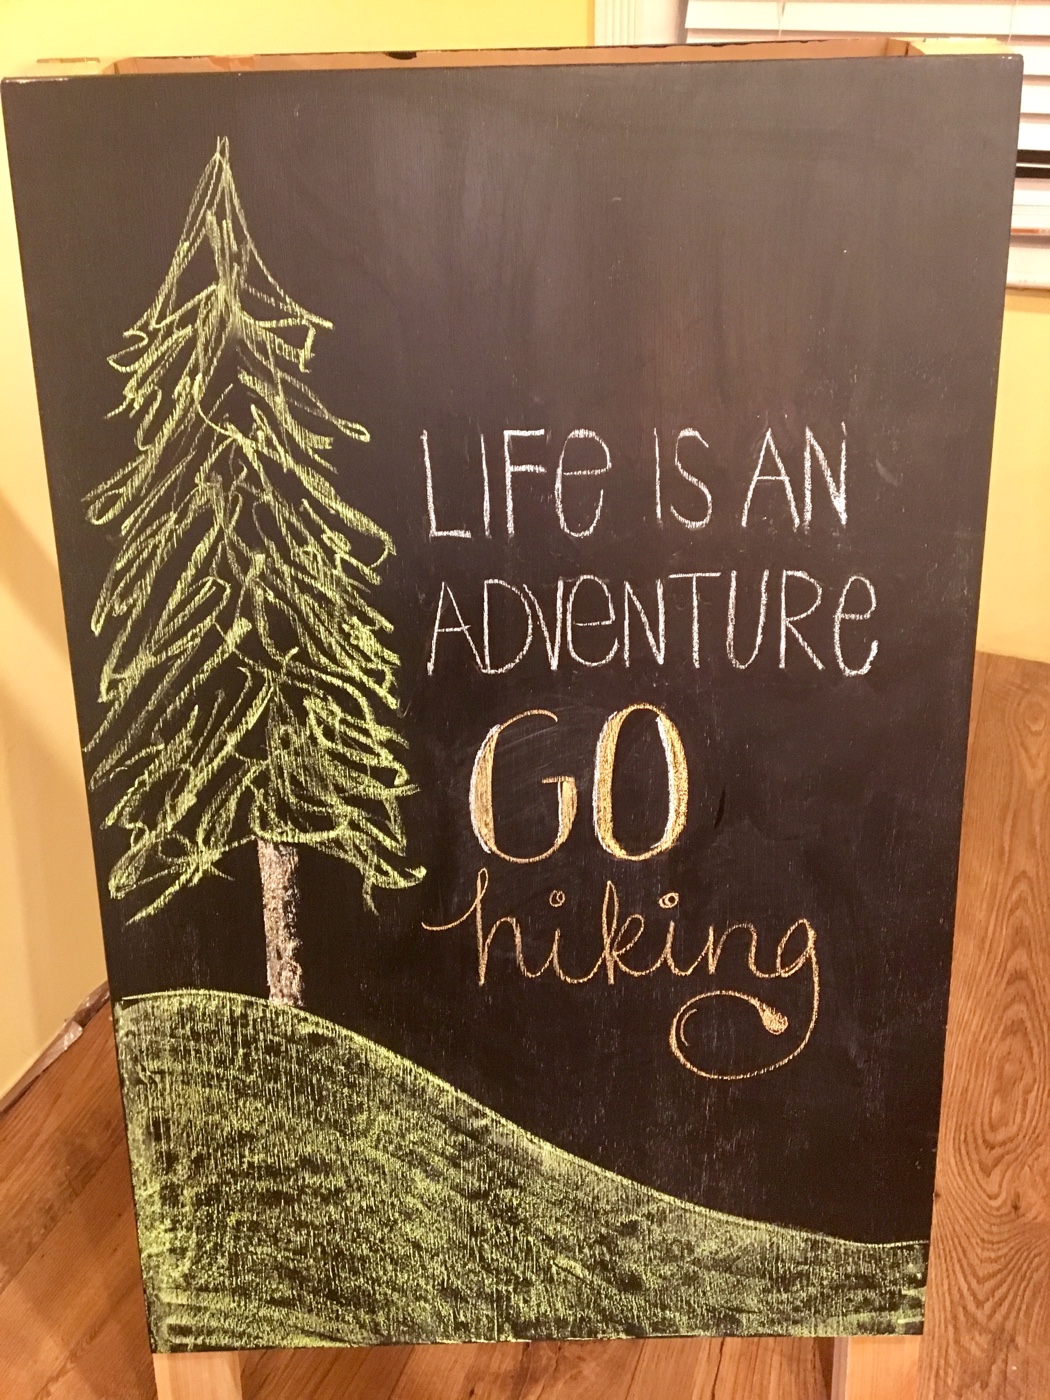
I love my trusty chalkboard. I get so much use out of it! If you have one, this was a super simple thing to draw. Just make a bubbly, lumpy shape with the side of your chalk, coloring it all the way in. Then with the tip, trace around the outside. I used a q-tip to clean away the shape of the mouth, added white teeth, and the eyes. This chalkboard is the first thing the kids see when they come downstairs. It is usually the way they figure out the surprise theme for the day.

Monster Theme Birthday Party | mamasbrush #monsterparty #birthdayparty #boybirthdayparty #monsters #eventplanning #partyplanning

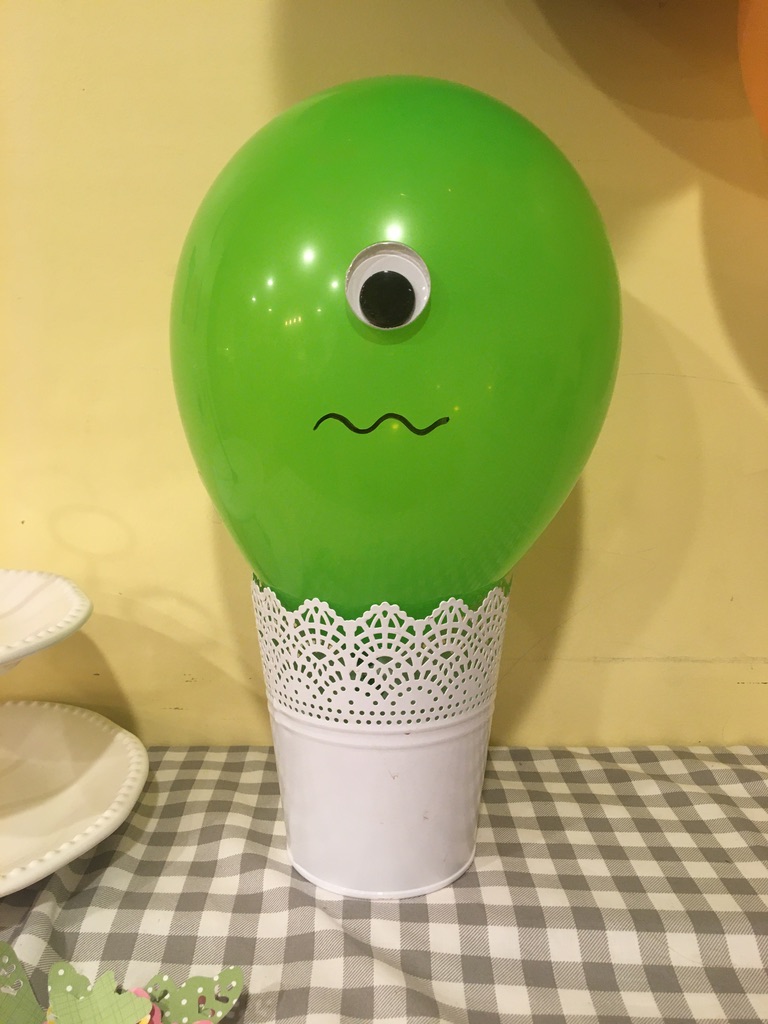
Other balloons were used independently around the room, stuck to walls or resting in containers. I added a wiggly eye and a little smile or other shaped mouth and, poof, a monster was born.

Monster Theme Birthday Party | mamasbrush #monsterparty #birthdayparty #boybirthdayparty #monsters #eventplanning #partyplanning

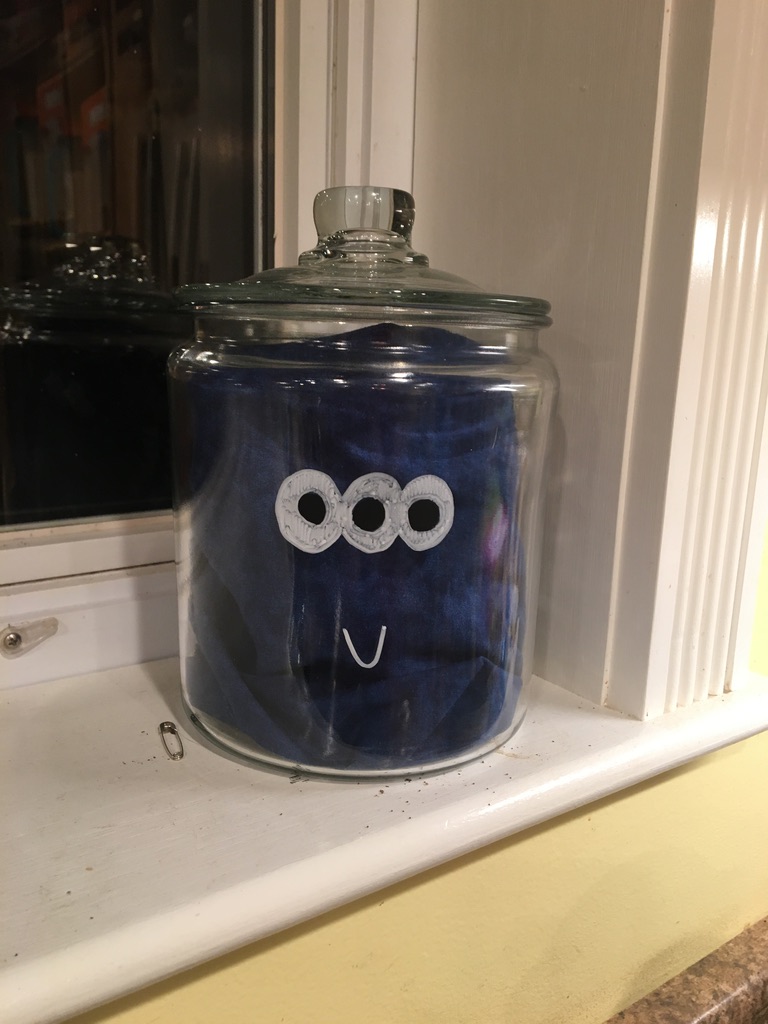
This was an empty jar I had laying around. I bunched up some dark blue fabric inside and added some eyes and a mouth with water-based paint pens (note: make sure they are water-based. The oil-based paint pens may not come off.) Easy, quick, and cheap party decoration! 🙂

I love to use those water-based paint pens to add a touch of birthday to the bathroom mirror too. These monsters were simple to draw. I just scribbled a random shape and added eyes and other details to make them into monsters. One of them even has little toes (just lines people… you can do this!)

Monster Theme Birthday Party | mamasbrush #monsterparty #birthdayparty #boybirthdayparty #monsters #eventplanning #partyplanning

Breakfast was regular donuts picked from our local donut shop. To them I added candy eyes (those candy eyes are the maker of monsters!) Easy peasy! Just as easy with donuts from Walmart or even toast and jam for a more frugal option!

Monster Theme Birthday Party | mamasbrush #monsterparty #birthdayparty #boybirthdayparty #monsters #eventplanning #partyplanning

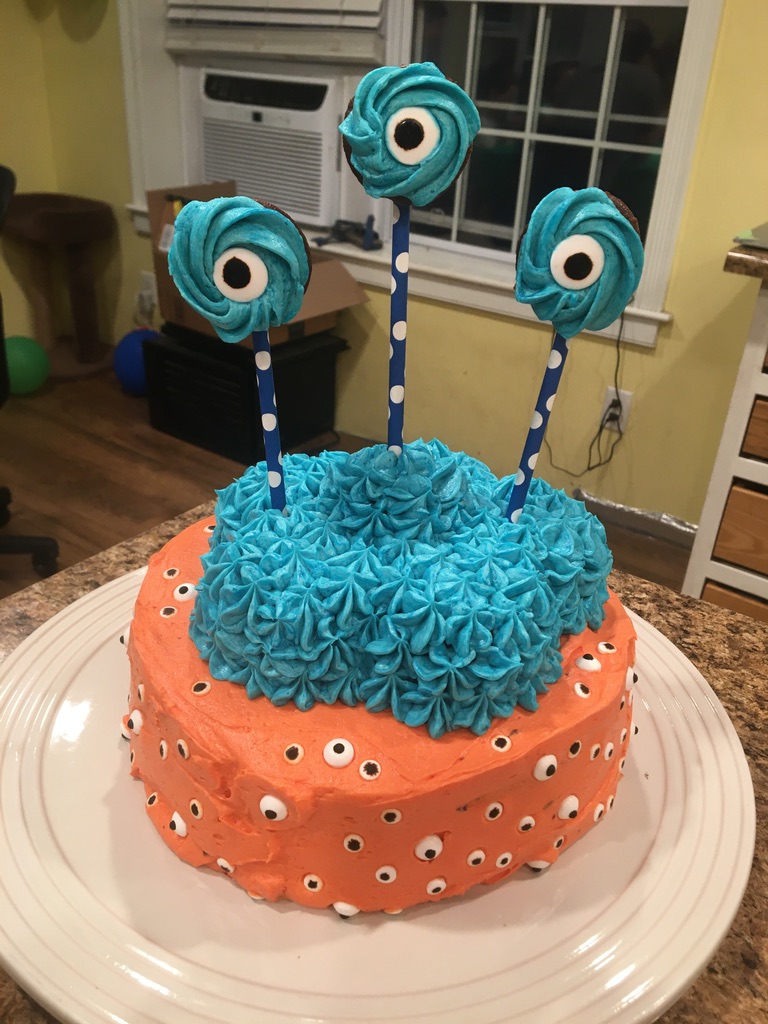
The Monster cake is my favorite part of the day. I started with a plain two layer cake and frosted it with the orange. Then I added the candy eyes in various sizes all over. On top are 6 cupcakes that I frosted with the blue using the star tip. Those eyes are simply mini cupcakes stuck on paper straws. I frosted them in the same blue and added large candy eyes. So simple to make, but such a great impact!

Are there any little monster details you plan to try on your next party? Let me know how it goes! 🙂

Pin it Button from mamasbrush
Monster Theme Birthday Party | mamasbrush #monsterparty #birthdayparty #boybirthdayparty #monsters #eventplanning #partyplanning

Blessings,
Babychaser

You can find me gathering here.

Take a Hike – How I Made a Sloped Birthday Cake

Turns out I had to come up with my own plan for this hiking theme cake. I searched and searched for ideas. I have some on my Hiking Party Board, but nothing was going to work with the time available and I didn’t need 30 people worth of cake. In addition to that, I made a camping theme cake several years ago for the same kid, so I wanted it to be different. (aka no tents)

Hiking Trail Cake -- Easy Hiking Theme Birthday on a Budget

As I mentioned earlier this week, the end of July we spent with our oldest daughter in the hospital, leaving very little time for preparing for this birthday. I made the cake (from a box mix) the night before, but I set the temperature wrong and it turned out dry. This set me behind. Usually I freeze the cakes before assembling and frosting them, but after our birthday breakfast we made a new cake (thankfully we had a back up box of cake mix!) and set it to cool on the counter.

First of all, I baked the cake with these even-bake strips from Wilton. They help the cake to rise more evenly. After lunch I was ready to begin frosting the cake. I leveled my cake layers like this (a great video about leveling and frosting cake layers.) I set the tops off to the side to be used later (I had to guard them well as there were several children floating around looking for scraps. )

Frosting the layers was little trickier since they weren’t frozen, but it worked. I did something different for me this time and used a piping bag to pipe the frosting between the layers. (Here is another great video about frosting cakes.) Piping it on helped greatly since the cake wasn’t frozen and was apt to fall apart as I spread. I’m still not great at all the techniques of cake decorating, but I’m having fun learning with each new birthday. 🙂

The Layers

[Ack! There are no pictures of the process. Time was short and I was working as fast as I could to get done in time for an early dinner and celebration. But I’ve drawn pictures for you… I hope they help!]

One of the cakes was falling apart on one side (whether this happened coming out of the pan or with the help of one of my smaller children is undecided). It worked out though, because I used that spot, after the second layer was on, to cut and shape a slope out of that layer down to toward the first layer(see diagram… these are not to scale!!).

Then I frosted only part of the top in a semi-circular way. Then I placed one of the cake tops (saved from before) on top of the frosting and trimmed away the cake that went over the side.

I then added frosting to that layer and repeated with the second cake top saved from before, but I offset it even further (see diagram… still not to scale!!). Then I trimmed away the rest of the cake top and handed out scraps to the hovering children.

This is what it looked like from the side when all the layers were ready.

I then applied the crumb coat and stuck it in the freezer for 20-30 minutes to harden so that I could finish the decorations (and make more frosting.)

Hiking Trail Cake -- Easy Hiking Theme Birthday on a Budget

I frosted the whole thing with a light green buttercream frosting I made from scratch.

the Creek

On top of that I used blue cookie frosting we already had on hand. I don’t recommend this particular icing, though, because it took a long time to set and ended up sagging down the slope after the pictures were taken. I can already tell in this photo that it had begun. I picked a random place on the cake for the creek and worked a line across the cake and down to the cake plate. Then I just did that several more times to make it thicker . The lines of it melded together nicely.

Hiking Trail Cake -- Easy Hiking Theme Birthday on a Budget

The Path

I mixed in some white buttercream with chocolate frosting I had in the freezer, left over from another birthday, and it made for a nice “path” color. I piped that onto the cake, making sure to cross the creek, and ended it in a larger area at the top. The kids decided that the picnic tables would go there (the imaginary ones). 🙂 My oldest son figured out how to cut a pretzel so that we could use it for the bridge. Good luck with that, mine kept breaking! 🙂

How I made a Sloped Cake for a Hiking Themed Birthday

The trees

For the trees on the cake I used left over Cupcake Icing we had from another birthday and used the star tip that came with it. I don’t know what color it was because I used the last of it and threw it away, but it was super handy for a quick decorating job. You could do the same thing, though, by making your own frosting and using a star tip. It worked a lot like “spray cheese.” I made both the trees on top of the cake and the ones on the tall side of the cake. Then I put “bushes” around the cake on both sides of the creek until I ran out. The trunks on the back trees are the chocolate frosting I had kept back before adding the buttercream to make the lighter brown for the path.

How I made a Sloped Cake for a Hiking Themed Birthday

A few hints on tree placement:

1. I put several “trees/bushes” close together at the start of the creek to give the illusion that it started there in a hidden spring under the trees.
2. I put a tree in the crook of the path to give a reason for the sharp bend in the path.
3. I put several trees at the top around the “eating area” of “path” frosting to mimic a shady picnic area.

Do you have an event coming up that could use a sloped mountain or hiking cake?? Pin it for later. 🙂

Pin it Button from mamasbrush
How I made a Sloped Cake for a Hiking Themed Birthday

Gathering here.

Recommended Reading:

Easy Hiking Birthday Theme on a Budget
Mountain Rice Krispies Treats
Birch Log Pretzels
Get Away to the Mountains Simple Watercolor Painting

Easy Hiking Theme Birthday on a Budget

I wasn’t sure how I was going to make this “Hiking” themed birthday different from the “Camping” theme we did a few years ago, and let me tell you, inspiration was not coming. I had only general ideas going into the evening before the big day, but hopefully that is just proof of how easy and budget friendly this whole theme was.

Birthdays are a big deal around here, and if you’ve been around a while, then you know that there is always a theme. I was really struggling with what the theme would be this time around since the interests of my now nine year old haven’t changed much over the last few years. I’ve done all the themes already. What he really wanted was a hiking theme, but I kept fighting against it since we just did a camping theme a few years ago.

Added into all that, my husband and I spent 10 days during July in the hospital with our oldest daughter and, while she is in full health now, the week we got home was full of recovery and catching up from being away from home and the rest of the kids for so long. That left only a few days to figure out what I was going to do for this birthday.

Finally I gave in. Hiking theme it was… but I had no idea what I would do. Pinterest is always a huge help, but most of the “hiking” searches brought up tons of great “camping” themed party ideas. Or “national park” themes. Still not exactly what I was looking for. (See my Pinterest board for more ideas!)

One thing I did find was cute hiking signs I could print… but my printer wasn’t working at the last minute, so we didn’t have those.

So what’s a girl to do with no balloons, no streamers, and no idea what to start with? I headed upstairs to to the attic for the Christmas/winter decorations. Yes I did! You may recognize some of these from the Cozy Mountain Lodge Women’s Retreat I decorated for earlier this year too.

I put some of these decorations on my much loved shelves.

Adventure Awaits Hand Painted Card -- Easy Hiking Theme Birthday on a Budget

And I try to paint/illustrate a little card for each of the kids on their birthday. It’s become something that is really special to them. This time I thought it fit nicely in the decoration. You could totally do this painting. I painted the green part of the tree loosely, leaving gaps here and there in a light green. After that dried, I did it again with the same paint, but not going all the way to the edges. Then a third time after it dried again. Once it was all dry the fourth time, I added the brown trunk. Sometimes I simply use a tall triangle for a pine tree. It works great!

The mountains I put on a pedestal in the middle of the breakfast table. (Excuse the wrinkled tablecloth… the epitome of last minute.)

Birthday breakfast was cinnamon roll mountains. Super easy! Two cans of cinnamon rolls from the refrigerated section of the grocery store (though you can make your own if you have the time and inclination). I just unrolled each one and re-rolled it in the slightest cone shape. A little tip: don’t go too high with your cone or it will topple over… but I just made that one mine. 🙂 No big deal.

I made little flags out of scrapbook paper and glued “take a hike” circles on to them. The stick is a skewer I cut into three parts. I hand wrote the “take a hike” but you could use something printed off the computer or even stickers if you can find something you like.

Life's An Adventure... Go Hiking! Chalkboard -- Easy Hiking Theme Birthday on a Budget

The chalkboard was really easy to do. Honestly, the hardest part was the lettering. Again, you could even use a simple tall triangle for the tree if the scribbled lines are too much. I found that the orange chalk gave enough of a brown feel over the black of the chalkboard that it worked perfectly.

Hiking Trail Cake -- Easy Hiking Theme Birthday on a Budget

The cake was the most last minute of all. I baked the cake the night before… but I used too high of a temperature and it was dry. So my daughter and I remade it that morning. That afternoon I was assembling my cake unfrozen (freezing them first makes it super easy to assemble and frost!!) and with no real idea of what I wanted to do. None of the 2-3 pins I found were what I wanted/had time for, so I was on my own. The cake has it’s own post! Click over to find out how I made it! 🙂

And that’s how we did our easy hiking theme birthday on a budget! To top it off, we recommended some hiking themed birthday presents to family who were looking for ideas, so the back pack, nature journal and compass really added to the excitement! 🙂

Pin it Button from mamasbrush
Easy Hiking Theme Birthday on a Budget

Gathering here.

Recommended reading:

Take a Hike: How I made a Sloped Birthday Cake
Ladybug Birthday Party Theme
Every “BUG”ys Welcome Adoption Party
Mary Poppins Birthday Party Theme