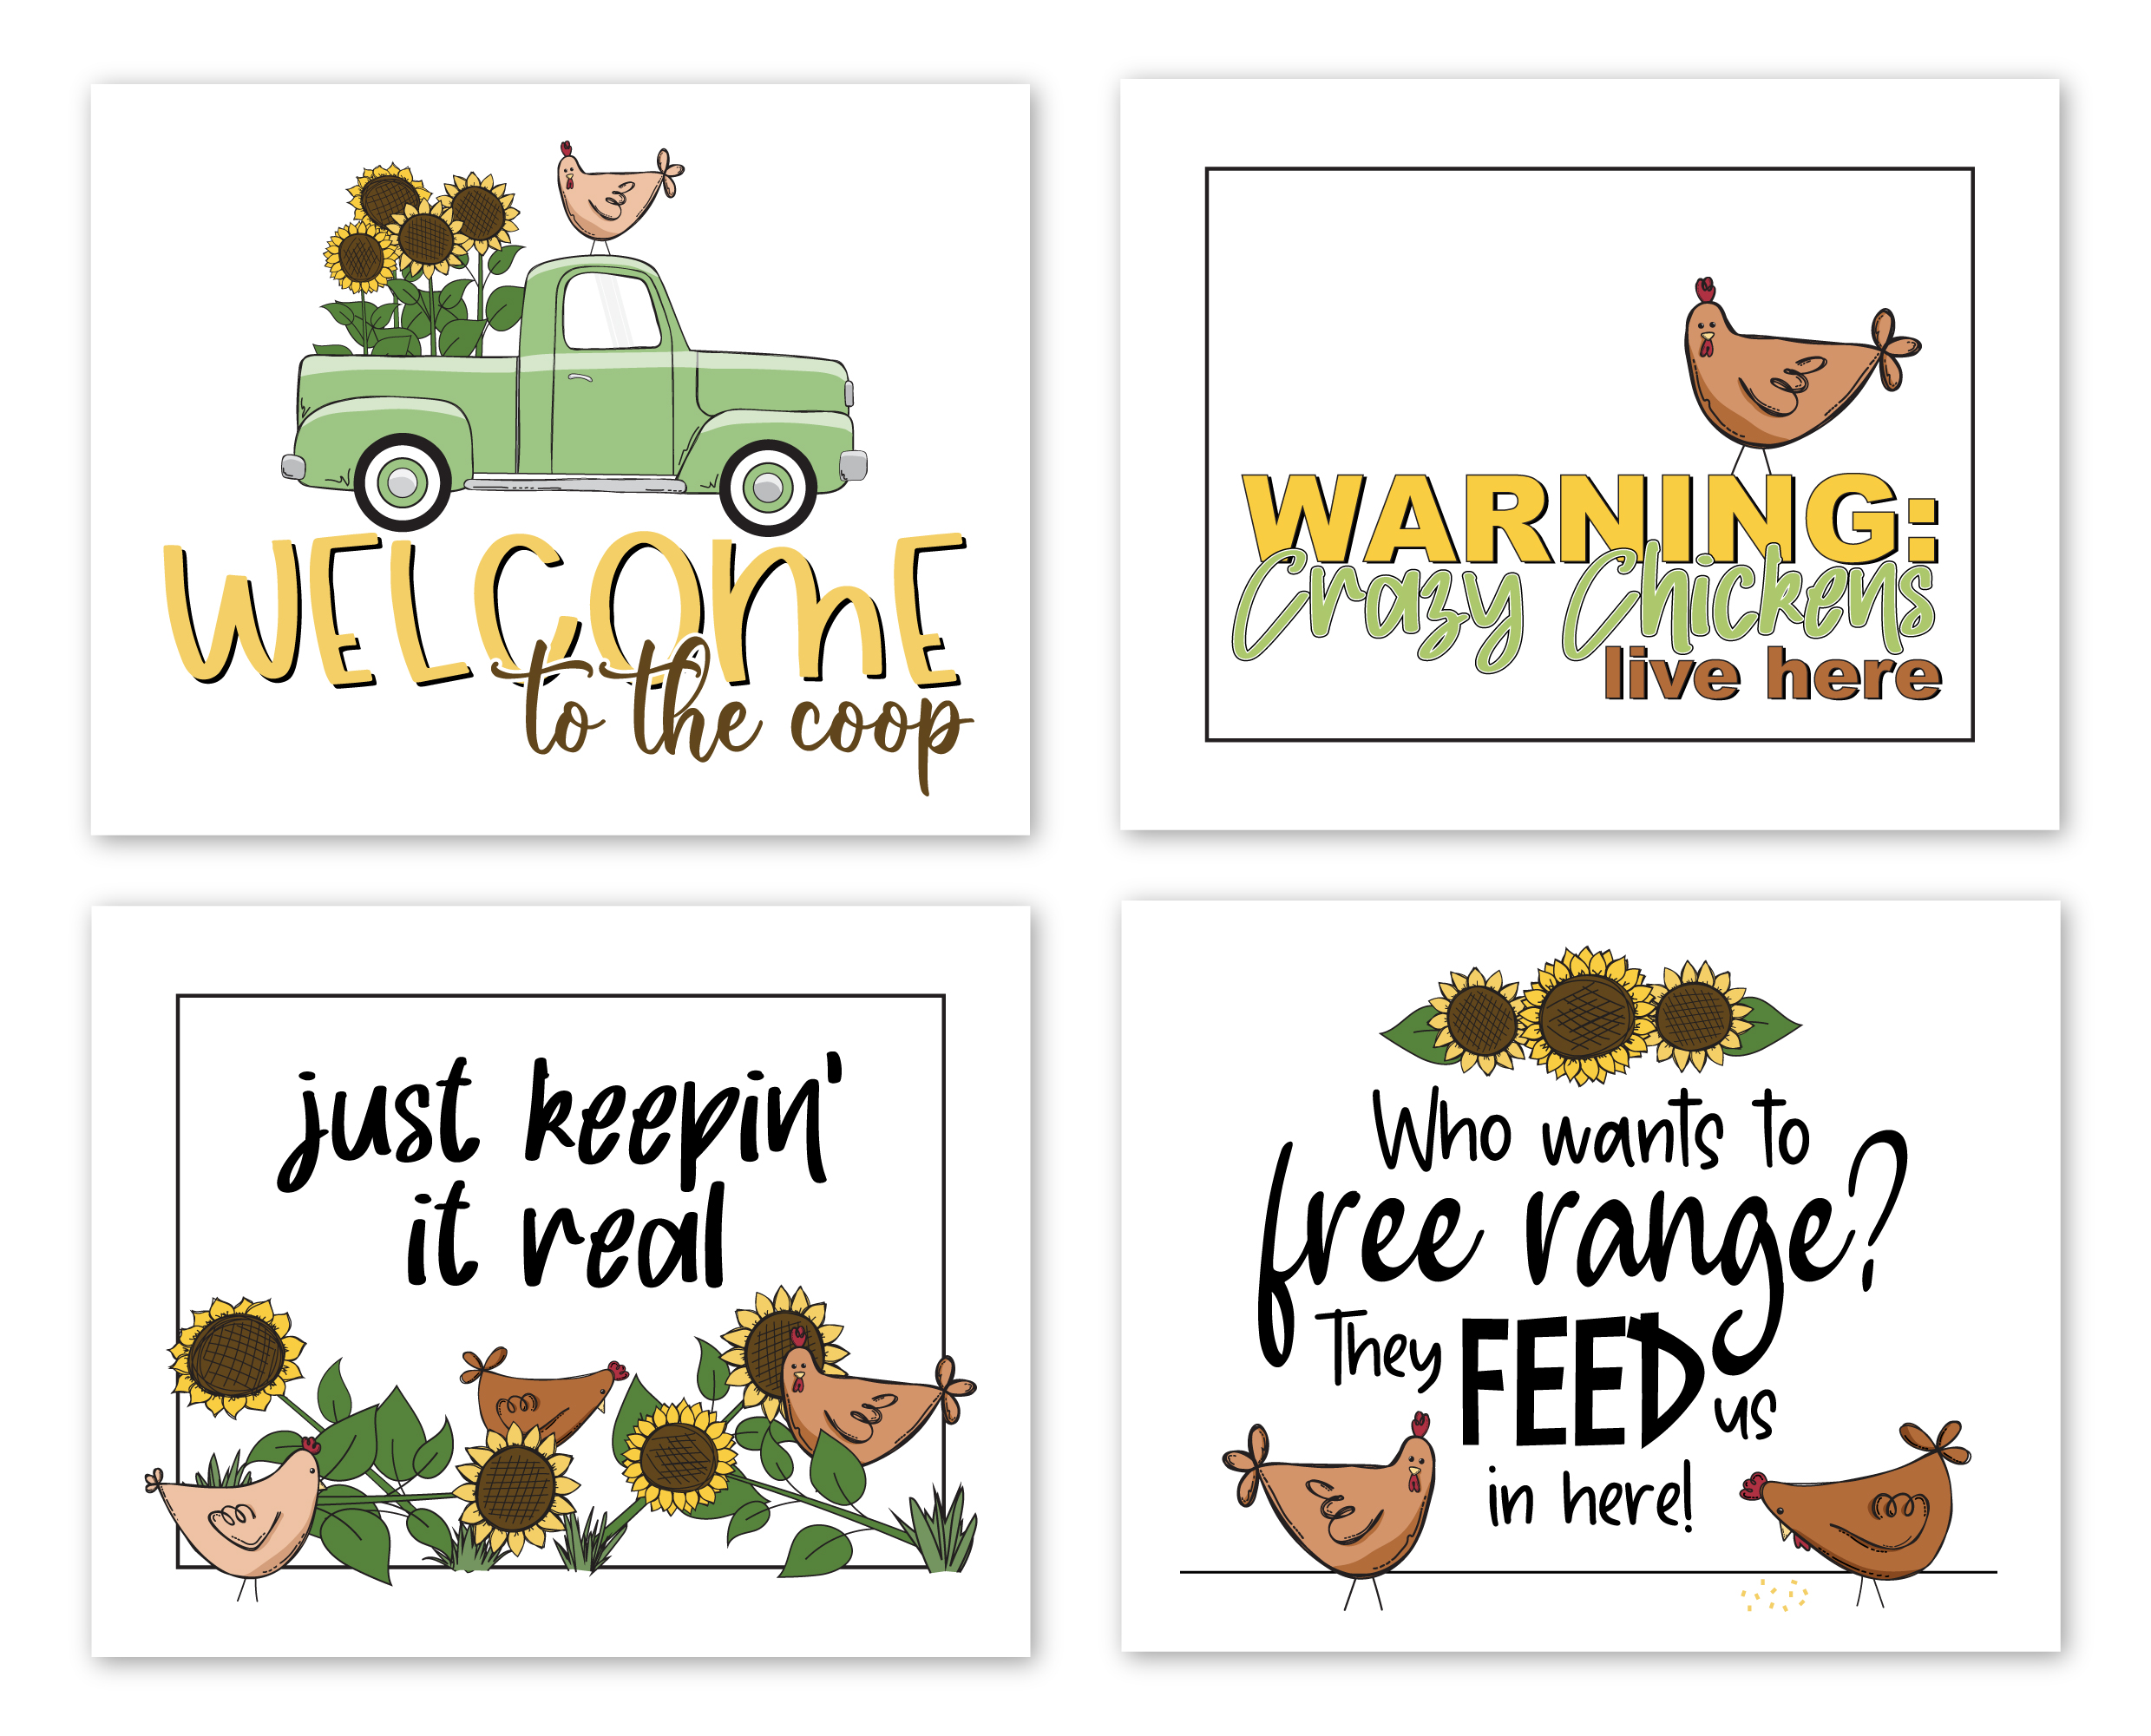
New Chicken Coop Signs

I know I have a wide range of people who are readers here. Raise your hand if you are a chicken person (okay… leave a comment?). If you aren’t sure, you probably aren’t. A chicken person doesn’t necessarily have chickens themselves, but they want to. And not all people who have chickens are chicken people. (Am I right?)

 Chicken coop signs | mamasbrush designs 


chicken signs, farmhouse signs, chicken decor

And of course, among chicken people there is a wide variety as well. Some just love the birds and others make fancy coops and decorate them seasonally. (Someday I want that to be me.)

We have chickens in a quarter of our garden with a somewhat ugly but functional coop. I made it myself with the help of 3-12 year olds (6 of them). I guess you could say that I’m a kid person at this phase of my life. 🙂 Anyway, I digress.

 Chicken coop signs | mamasbrush designs 


chicken signs, farmhouse signs, chicken decor

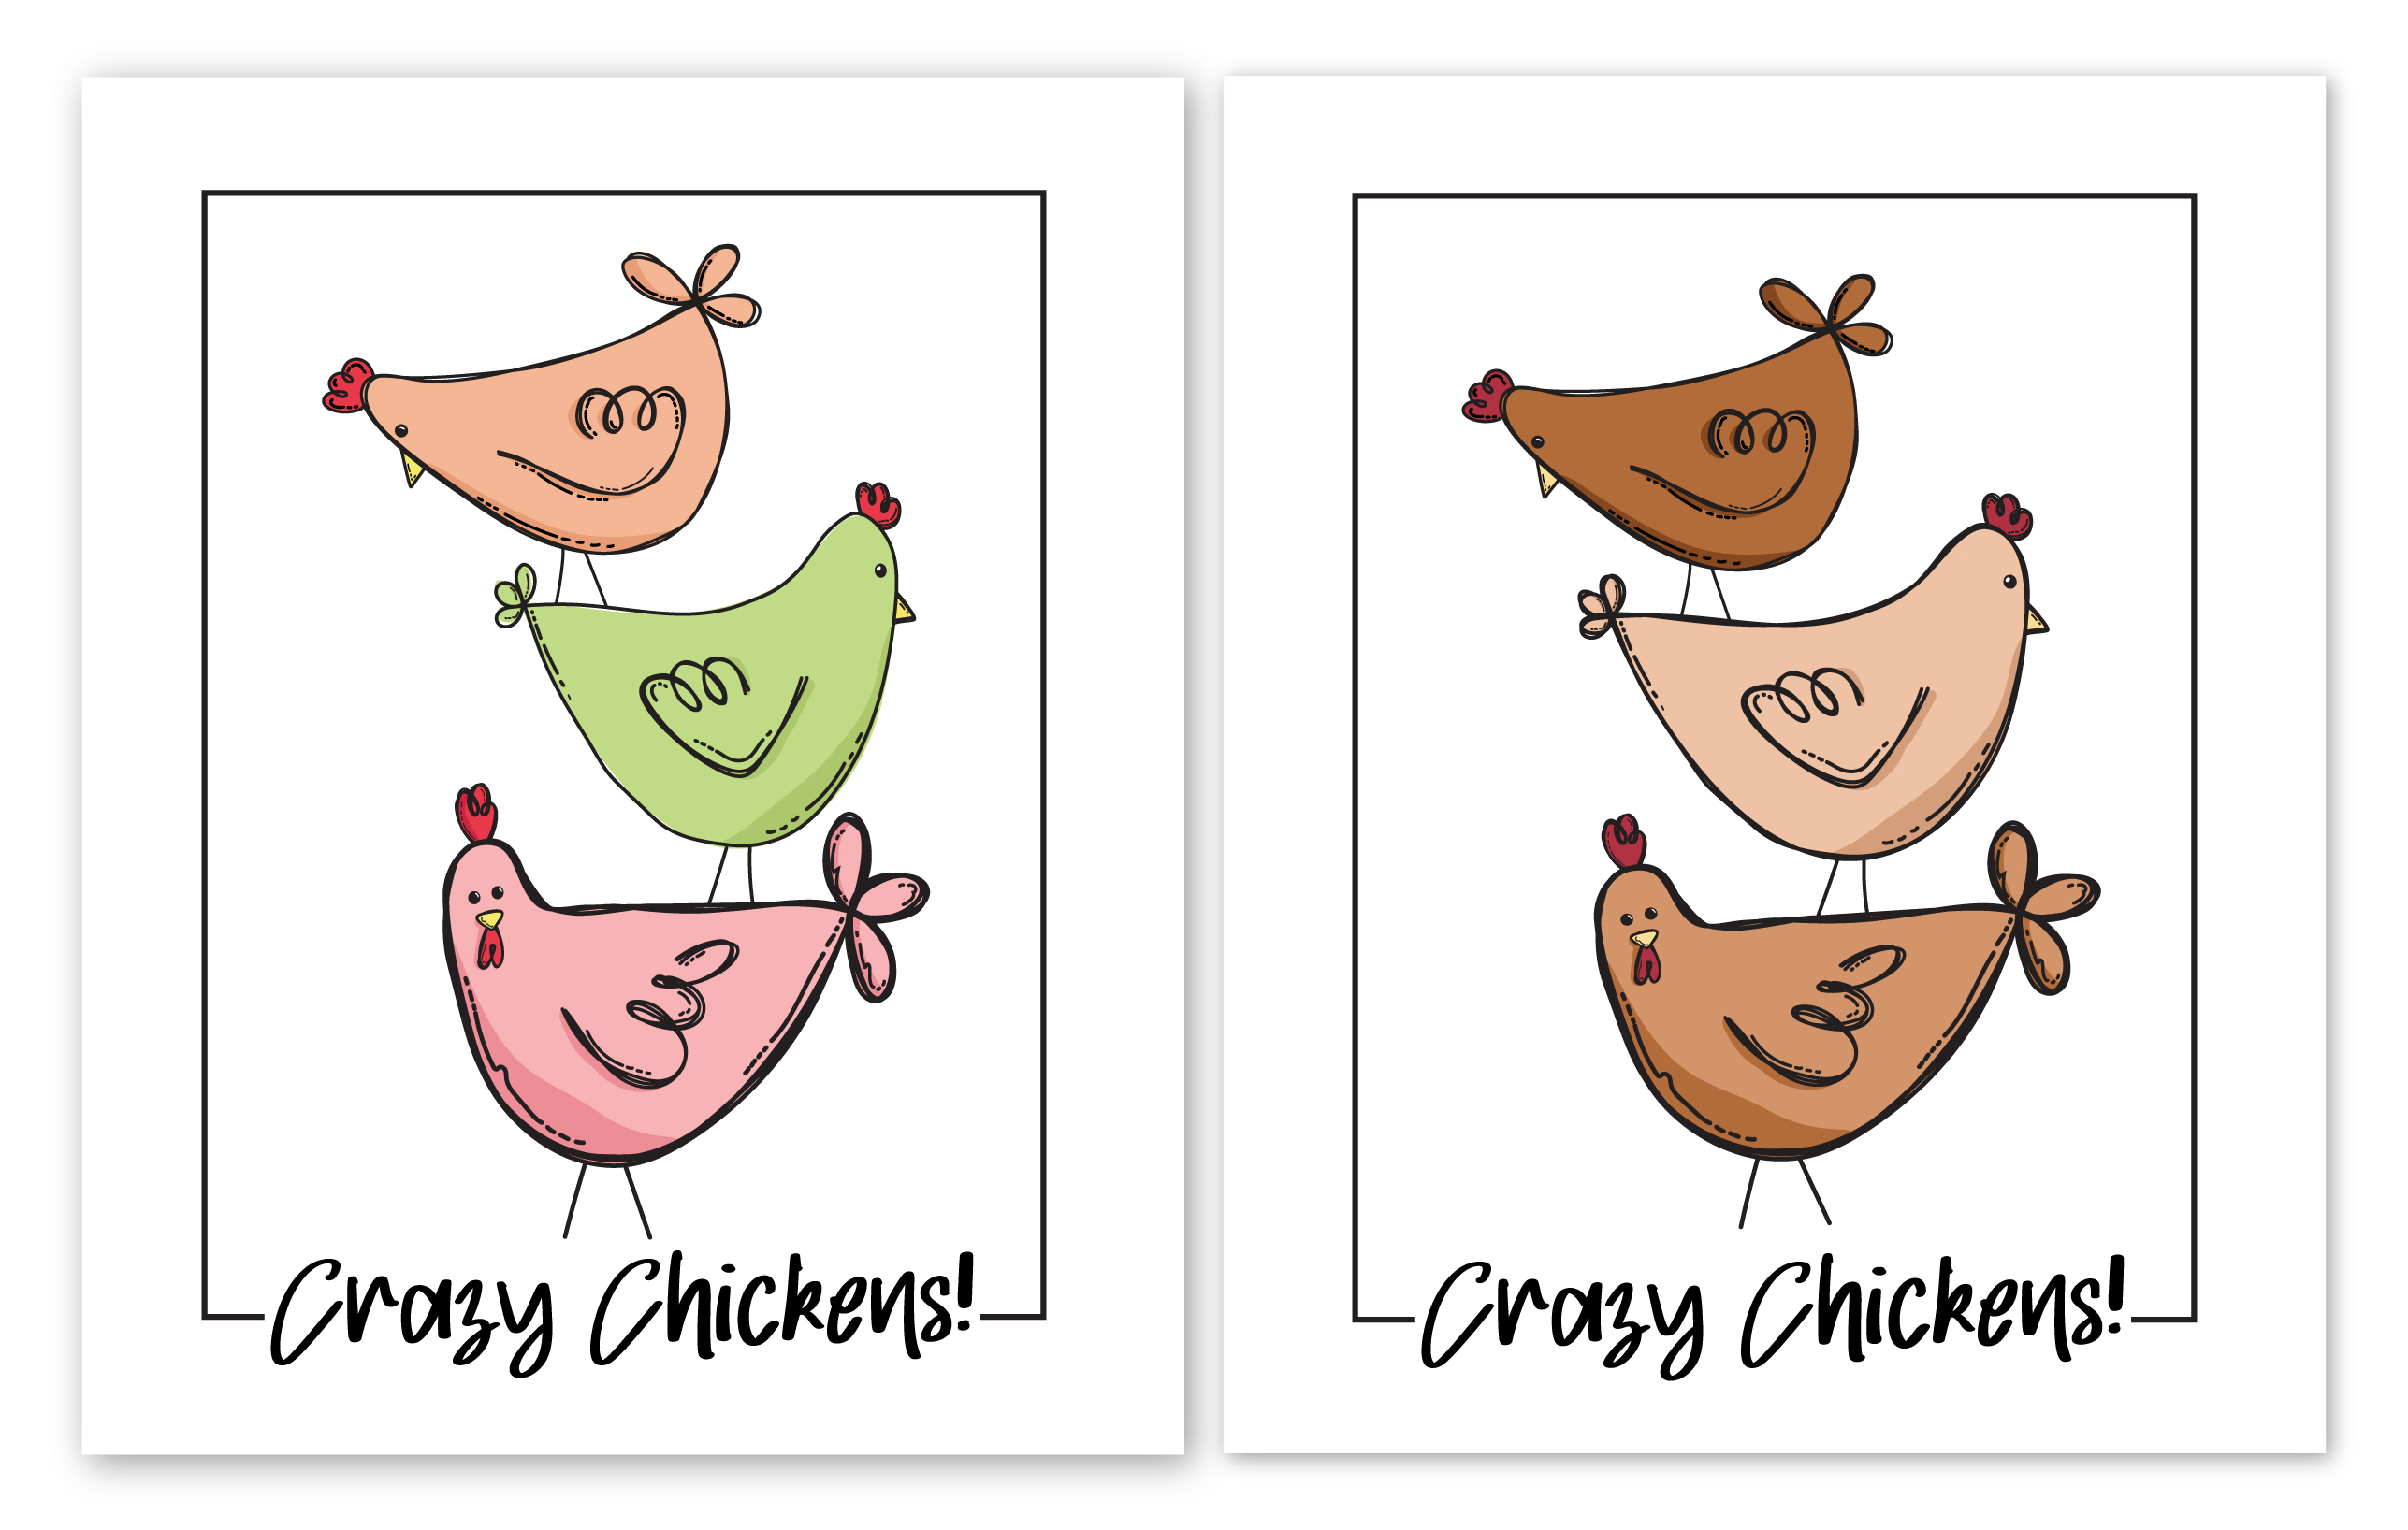
While I dream of what I would do if homeschooling and gardening, laundry and occasional house cleaning didn’t take up all my time, I made some really cute (sorry, I’m biased) chicken coop signs for you to decorate your chicken spaces with!

They are in my Etsy shop now. Head over to grab the bundle for yourself for 30% off this week. Coupon code COOPSIGNS30 or click here.

 Chicken coop signs | mamasbrush designs 


chicken signs, farmhouse signs, chicken decor

Frame them and and hang them under shelter if you have it. I think they would be cute mounted to wood and sealed from the elements and hung on the outside. Your call. What would you do with them? Let me know in the comments! 🙂

 Chicken coop signs | mamasbrush designs 


chicken signs, farmhouse signs, chicken decor
Pin me!

A Separate Niche? And how specific?

First I drink the coffee, then I do the things wall art with blue mug of steamy coffee and coffee beans.

I’m new in this Etsy world, and as such, I’m still learning with each passing week. One of the ideas I’m trying to grasp is this idea of niche-ing down. I guess it’s supposed to help me with my SEO (another learning curve to be sure!) All that to say, “everyone” seems to encourage separate shops for separate types of product (since I wrote that, I did find one person who says it isn’t necessary, which is good since it’s super hard to do it all the way). I’ll be playing with this some in coming months (I’m a slow learner and, as I said in my last post, this is my busy season.) I suppose I’ll move some of the things I already listed in my shop to another shop that is more “niche-d down”, but in the mean time, I have indeed started a new shop.

I’ll be honest with you all. I’m figuring all this out as I go… or not. (Probably not!) I’m not one of those “made $2000 my first month on Etsy” types. (Wouldn’t that have been cool?!?) I’m excited that I’ve sold anything! Really, that some of you actually like some of what I do is very exciting to me! So in this first step of choosing a niche and sticking with it, I’m doing something “they” say not to do at the same time. I’m trying to sell wall art on Etsy.

Let's meet over Coffee Print

minimal, black and white line art, Bible and Coffee, word art, wall art

Apparently it’s very competitive. I understand this concept. If there are thousands of other artists trying to share what they make on Etsy, how will I ever stand out? That’s the trick, though, isn’t it? Finding my niche in the wall art world. This new shop will focus on the decorating side of what I do. My first shop is off to a good start in the functional and practical side of my illustrating — like my Egg Counting Sheets, Bible Journal, and Bullet Journal Pages (more to come). This second shop will be the online presence of the decor side of mamasbrush. (As relavent listings in my first first shop expire, I’ll move them to this new shop.)

Do Hard things like Esther Wall Print

Crown, pink, word art, minimal

I have a small handful of items already listed with plans for many more. This is also the shop where I will sell my seasonal and holiday decor. (Christmas in July anyone?) If only there were more hours in the day. 🙂 But as it is, I’ll just keep picking away at them and add what I can when I can.

To celebrate the opening of my new shop, I’m having a sale through June 8th. Come on over and check it out!

You can find me gathering here.

My Fabric Design For Sale

Chickens and Trucks Fabric Design | mamasbrush #oldtruck #farmhouse #chickens #fabric #surfacepatterndesign #pastelchickens

Chickens and Trucks is a fabric design I entered into the Spoonflower Challenge this last week. I am really happy with the way it turned out. We were supposed to use those three colors in our designs. I struggled with what to do until my husband suggested the trucks. I had a really cute design I was happy with, but I was getting mixed reviews from the family. It was my husband, again, who challenged me to push a little further.

I had these chickens from another project so I started to play with the colors. Who would think of making pink and green and purple chickens? I kept working with it. At first I was just going to do the chickens, but then it occurred to me that I could use both the chickens and the trucks… and “Chickens and Trucks” was born! I was super excited to see that people seemed to like it as well and I placed at #66 this week! See it on “real products” here.

I’m thrilled to announce that Chickens and Trucks is now available for purchase in my Spoonflower shop!

If you like my Chickens and Trucks design, would you please pin the image below or share it on other social media!

You can find me gathering here.

Pink Kitchen Themed Bridal Shower

Pink Kitchen Themed Bridal Shower | mamasbrush #pink #bridalshower #customrecipecards #cakedecorating #kitchenillustration #macarons #partyplanning #eventplanning

After what felt like several years with no bridal or baby showers in our church, we have had a flush of them in the last year or so. The first was a double shower. Two September weddings led to two brides needing showers in August. Both brides loved pink and cooking, so it just made sense to do a pink kitchen bridal shower!

Above is the gift table. My favorite part is the matching aprons hanging in the windows. Sorry it’s hard to see, but I used my Cricut to add their new married names and the year to them.

I designed these for each of the brides. The artwork is mine and some of the first I used Adobe Illustrator to create (before I had a tablet). They were super fun. There is a 4×6 recipe card… and a 8×6 foldable size too. The last gift is little gift labels with their names on them. Isn’t that whisk so cute? I love it! 🙂

I used both sides of my chalkboard this time. I had homemade tootsie rolls (rolling pins) sitting by it for guests to help themselves to on their way out. (Here’s the link to those!) The other side was visible as guests arrived. I loved adding Hebrews 10:24 – “Let us consider how to stir up one another to love….” (Anyone else love puns?)

Pink Kitchen Themed Bridal Shower | mamasbrush #pink #bridalshower #customrecipecards #cakedecorating #kitchenillustration #macarons #partyplanning #eventplanning

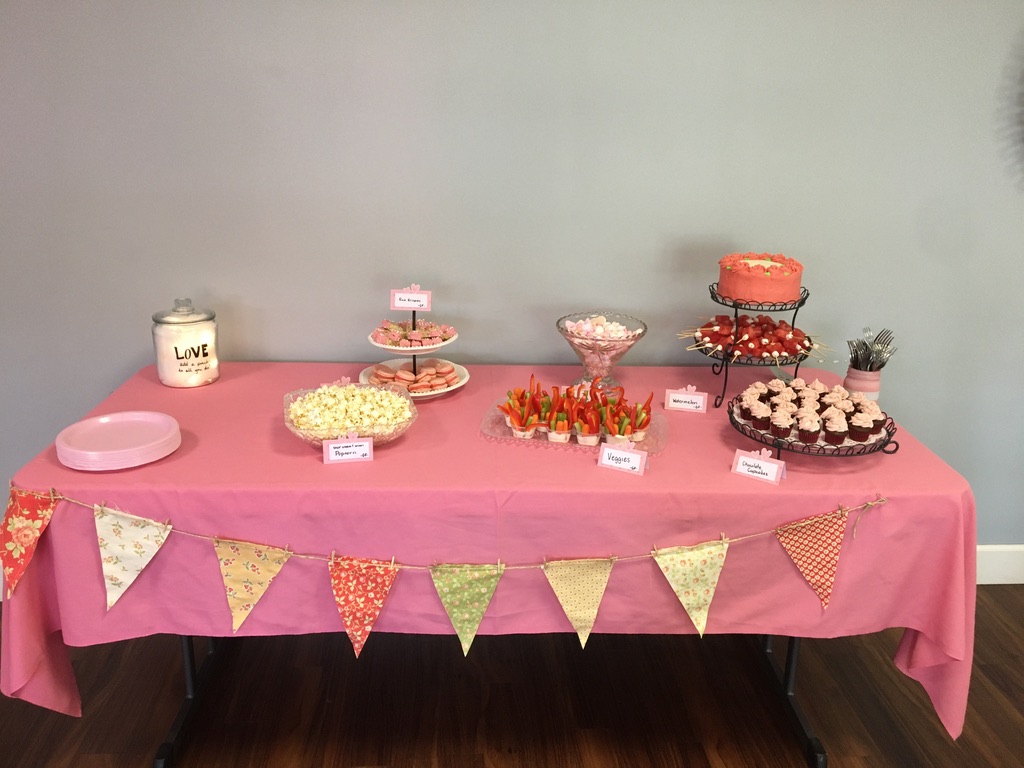
Dessert table – I’m noticing in this picture that I could have used something festive on the wall behind the table… oh well. 🙂

Our evening party was perfect for serving dessert. I try to have some non sweet/non sugar options as well, but mostly this was dessert.

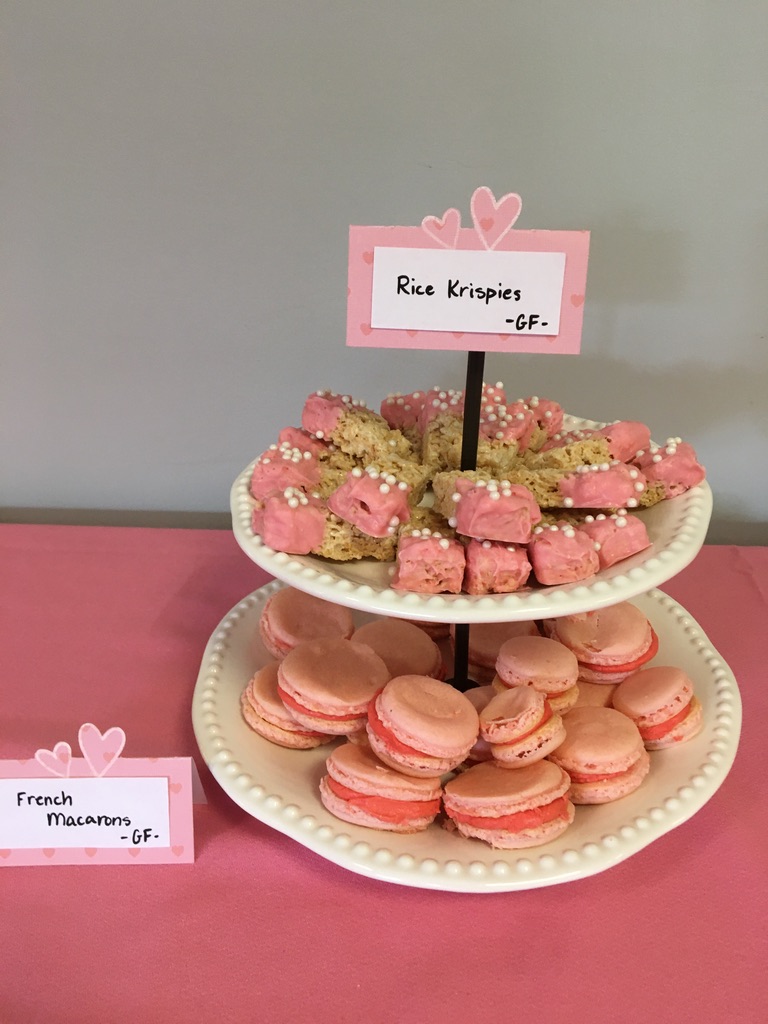
The food tags were made with my cricut and embelished with white pen to enhance the hearts. Both brides were gluten free, so I was careful to have gf options for everyone. Rice Krispies dipped in pink melting chocolates, macarons, fruit and veggies, popcorn, meringues and…

Pink Kitchen Themed Bridal Shower | mamasbrush #pink #bridalshower #customrecipecards #cakedecorating #kitchenillustration #macarons #partyplanning #eventplanning

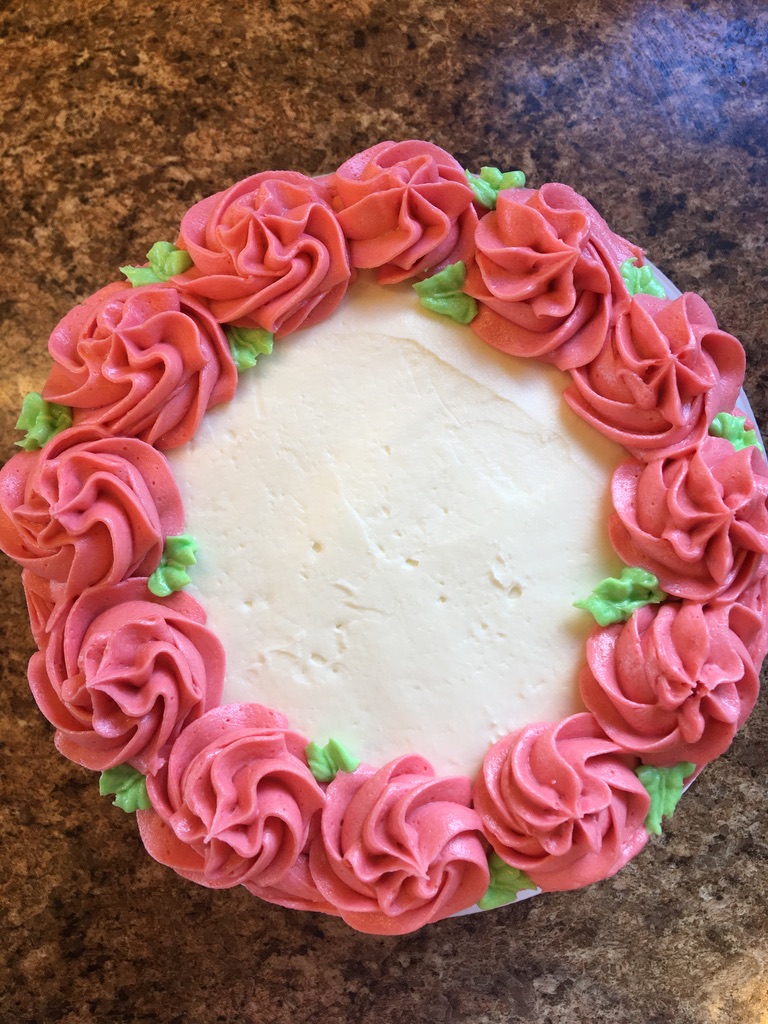
This cake was super fun to make. It was gluten free and the cupcakes were regular chocolate cupcakes.

Here are some close up shots of the cake for those of you who like that kind of thing. 🙂 I’ve been working on my cakes. I feel like this one hid my novice more than most. I was pretty excited that it turned out. I found an inspiration photo on Pinterest, I’m sure, but I can’t find it now. Check out my Cake Decorating board if you are interested, though, for more ideas!

I hope you found something to inspire you from this party. Remember, parties don’t have to be perfect to be appreciated. Everyone had a good time and the brides were blessed!

Until nextime,
Babychaser

You can find me gathering here.

Easy Chocolate Truffle Artwork – You can do this!

Easy Chocolate Truffle Artwork - You can do this!

Remember that chocolate themed birthday party I threw for my mom? The one I painted the Chocolate Frosted Cupcake for? Yes, the one I haven’t shown you yet. That’s the one! Good memory!

Well, I painted these cute little truffles for that party too. (Pinspiration here.) Again, part gift-part decoration! She actually hung them up already on the wall in her bathroom in little white frames! Yes… it’s adorable!

Easy Chocolate Truffle Artwork - You can do this!

I painted them with watercolor and added the white with Sharpie Paint Pens. Then I added a touch of black with my Faber Castel thin pen to add shadow and make the white pop. It really helped! Super easy!

You could do this with markers too! Just color in the chocolate with brown marker and then use the white paint pen (a couple coats would help!) and add the black lines at the end. (Keep the black on the same side of the white on all the lines so it has a realistic “shadow” look.) I think they would make adorable greeting cards! Let me know if you try!

Easy Chocolate Truffle Artwork - You can do this!

Looking at them now (I always notice details like this when I look at the picture of whatever I painted, not before) I think I would put the swirl one in the middle to make it seem more balanced, but that’s because I have issues with symmetry. What do you think? Would you switch them out to put the swirl in the middle? Or do you like them as is? Let me know in the comments!

Gathering here.
Recommended Reading:

Custom Chocolate Wrappers
Some February Painting
Custom Conversation Hearts

Something Sweet – Chocolate Frosted Cupcake in Watercolor

Chocolate Frosted Cupcake in Watercolor

This week I spent some time painting sweet things. Chocolate, to be specific. And all for my mom’s birthday.

Sometimes birthday presents don’t need to be wrapped. Don’t get me wrong, there should be some presents to unwrap! But they don’t ALL have to be, do they?

Chocolate Frosted Cupcake in Watercolor

I painted this one for my mom’s birthday this past weekend. Her bathroom is decorated in chocolate. That’s right. Chocolate. No, it’s not dirty fingerprints from over indulgent children. It’s been done on purpose. From a poster on the wall about it’s history, to candles shaped like truffles, and everything in between… chocolate!

Pin it Button from mamasbrush
Chocolate Frosted Cupcake in Watercolor

I thought a chocolate frosted cupcake with a pink liner would match her bathroom perfectly! But it also matched her birthday theme… so instead of wrapping it, I set it out to decorate! 🙂 Double duty!

Gathering here.

Recommended Reading:

Cupcakes – Watercolor Illustration
Let’s Meet Over Coffee – God
Ice Cream Parlor Birthday with Artwork to Match

Easy Watercolor Flowers YOU Can Paint

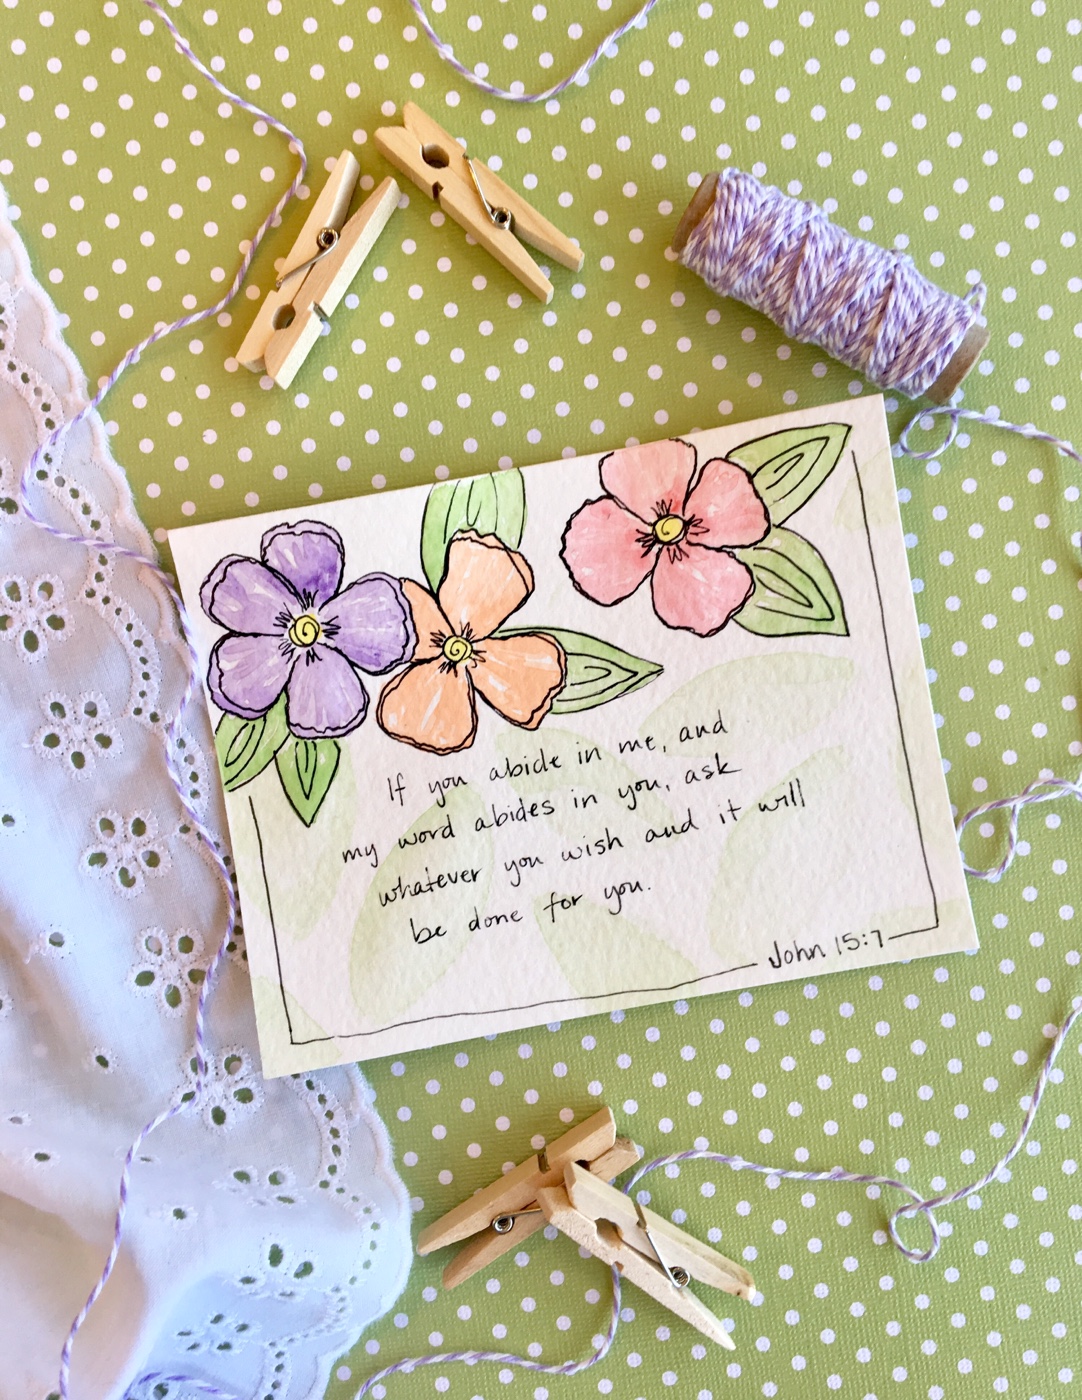
I painted these cards for a party we attended this weekend for a graduate in our church. I sat down Friday night with no inspiration of what I wanted to make. What I ended up with an hour later was easy watercolor flowers YOU can paint. I didn’t start out to make a tutorial (the party was the next day), so I don’t have pictures to share of the process, but I want to talk you through what I did, because these really are Easy Watercolor Flowers YOU Can Paint!

I painted this whole thing without a pencil drawing. This makes it easier for me because I don’t have to worry about getting the petals just right when the time comes.

Getting Started

The first thing I did was to paint yellow dots where I wanted my flowers. If you are making a greeting or verse card, give some thought to where you want your flowers, if you are practicing, just put them anywhere. They would be cute in a semi-strait line across the middle of your work space. Remember to leave space between the centers for the petals for each flower.

Let the yellow paint dry.

Adding Petals

When the centers are dry, you can begin to paint the petals. I chose a color palate ahead of time and thought through where I wanted them. I begin by painting the outline of the petals where I want them, sometimes 4 petals, sometimes 5. You can do what you like.

If the petals aren’t exactly the right size or shape, just add more paint and change them a bit (this is why I like painting with pencilwork first.) When I am filling in the color on the petals, I try to leave white spaces for a little textural interest.

Stems

While allowing the petals to dry I worked on the stems and leaves of this card. I am careful to leave a little gap between the still trying flower and the green of the stem, otherwise the colors will bleed together. I simply used the very tip of one of my size 7,8, or 9 brushes (though you could use a smaller one if you are more comfortable with it.)

I dragged the tip downward from the flower to the bottom of the card. Be careful to draw an imaginary line from the center of your flower through the petals so your stem placement is realistic. Go back and add paint to make it darker, or more water for thicker stems as needed.

Easy Watercolor Flowers YOU Can Paint -- My Creative Process at mamasbrush.wordpress.com

Leaves

I first added leaves to the stemmed flowers because they are further removed from the wet paint of the petals. I chose a very traditional leaf shape and deliberately left them running off the edge of the paper and behind a nearby flower (though you need to make sure the flower it touches is dry first).

Easy Watercolor Flowers YOU Can Paint -- My Creative Process at mamasbrush.wordpress.com

For the leaves on this card, I waited for the petals to dry and added leaves coming from behind the petals. Do you see the faint leaf behind the others on the purple flower on the left? That was the original leaf for that flower and it was way too big. I added a bunch of water and tried lifting the already dry paint with a paper towel, but it didn’t lift all of it. I was a little disappointed that I’d ruined the card, but I moved ahead and added the smaller leaves instead, just for practice.

Fixing “Mistakes”

I set it aside to dry while I worked on other details, and while was working I had an idea. I decided to paint very faint large leaves all over the background of the card. I painted with a lot of water, let it sit a moment or two, then dabbed it up with paper towel. Not only was the card not ruined, it was the one I decided to use for the graduation party. When you find that you’ve made a mistake of your own, set it aside for a bit and see if you can brainstorm a way to make it part of your design. You may just like it better than your intended design! 🙂

Easy Watercolor Flowers YOU Can Paint -- My Creative Process at mamasbrush.wordpress.com

Another layer of color

When everything was dry, I went back in and added another layer of color to each of the elements. For some of the flowers I went around the edges with a darker color (see the purple flower on the bottom card). For others I made streaks of darker color coming out from the middle (the purple flower on the top card. For others still, I gave an extra layer of color on half of each petal. For the leaves, I added another layer (or two) of green on one half of the leaf. There are so many ways to do this, just experiment and see what you like!

Easy Watercolor Flowers YOU Can Paint -- My Creative Process at mamasbrush.wordpress.com

Finishing Touches

This is when I add my pen work. I usually do this the next day, since I do most of my painting late at night. The trick is to make sure your painting is completely dry! For the leaves I think a pointed version of a spiral is fun. For the petals, I trace each one twice, sometimes staying right on top of the first line, other times leaving a gap all around or even just on the end. I think this makes it look like the petals are curved around on the ends. I add some squiggly lines at the base of each petal and a spiral at the center.

My goal for these finishing touches was to make the painting cute and whimsical. If I wanted them to look a little closer to realistic, I may have used dots in the centers and simple vein like lines on the leaves. Go with what you like and have fun! Shayda Campbell once said, if I want it to look exactly right, take a picture. Painting is about giving it your own creative interpretation.

When all was said and done I added the verses I had in mind and the border. Since I was short on time, I just did a simple lettering and added the verse reference into the border as I like to do. I think it worked though. The flowers dressed it up enough and the lettering style didn’t distract from the painting or the message.

So will you try it??

Pin it Button from mamasbrush

Gathering here.

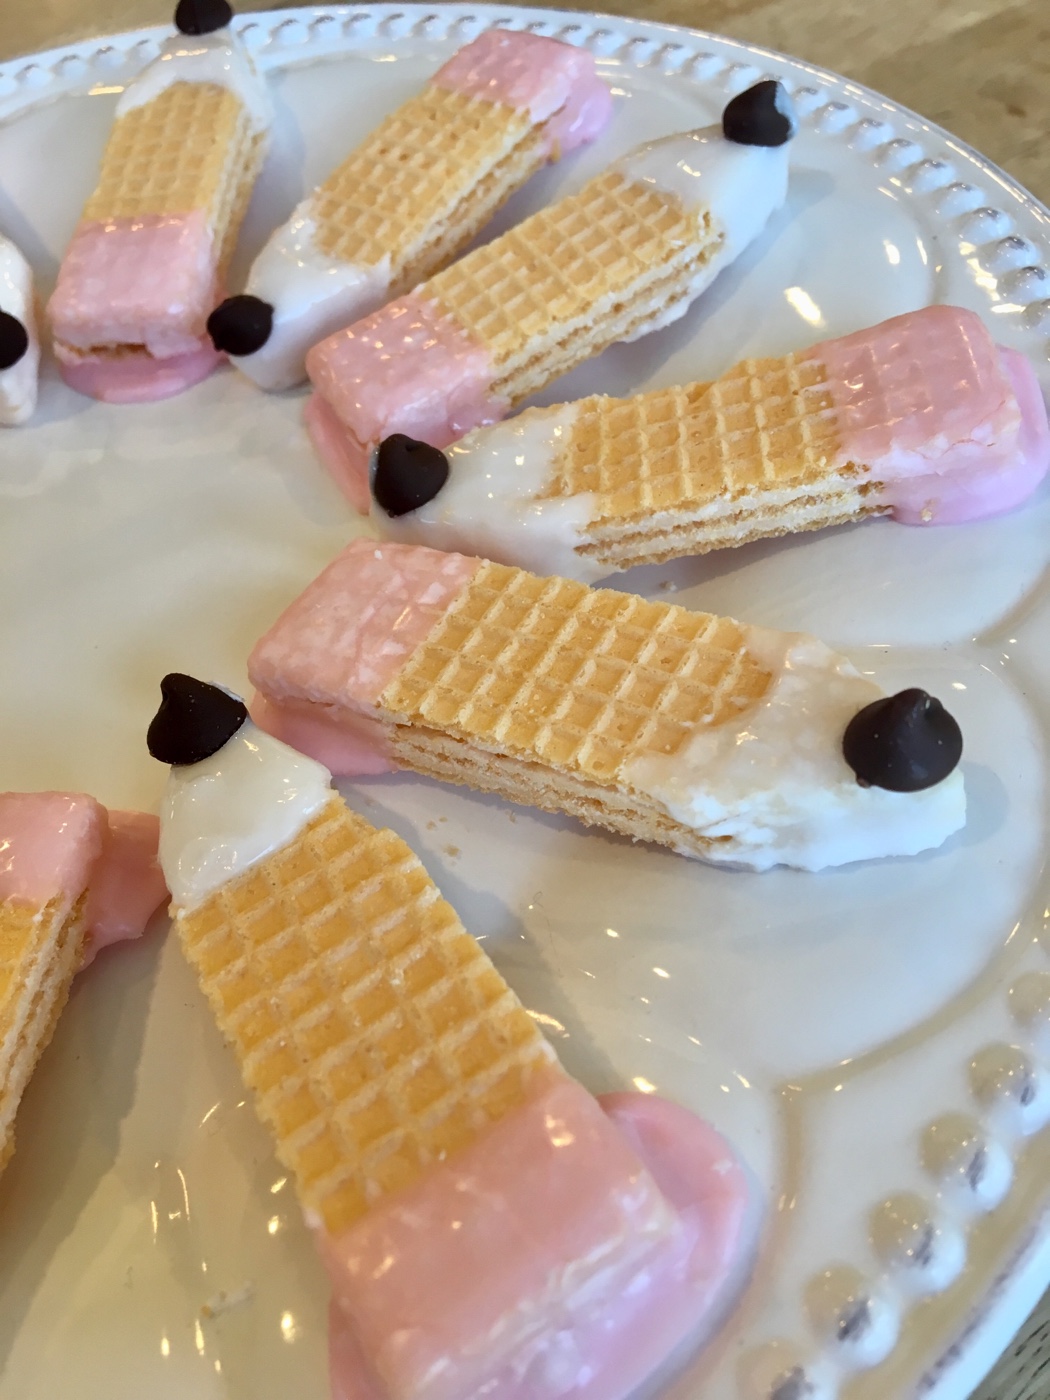
Easy Wafer Cookie Pencils for Back to Homeschool

Easy Wafer Cookie Pencils for Back to Homeschool

These adorable Easy Wafer Cookie Pencils for Back to Homeschool were super easy to make and so fun for the kids on our first day of school!

With the the approach of the 4th of July and all the other summery goodness, comes the start up of a new homeschool year for us. But who has time to spend blogging in real time? What? People DO blog in June? I don’t know how you all do it. I actually did post 3 times in June and I’m pretty sure other more important things didn’t happen because of it. June is just crazy for our family!

Easy Wafer Cookie Pencils for Back to Homeschool

That’s right, we start school July 1st around here. (Pop over here to find out why.)

Easy Wafer Cookie Pencils for Back to Homeschool

I saw the idea originally on Pinterest here, but you can find her amazing tutorial directly, by clicking this link.

As per usual, I didn’t click over to read the directions until after I’d done my own thing. That means I used different means to a similar end. 🙂

Instead of melting candies, I mixed up some powdered sugar and milk to make a simple frosting. I started with the white and dipped all the pencil tips. I then added the chocolate chip (mini chips would work better as Keri suggests, but I worked with what I had.) I put the sheet pan in fridge to set up after this.

A while later (30 minutes to an hour?) I added some powdered sugar and milk to the left over white frosting and then a bit of red food coloring. I had to go back and forth a bit on the amounts until I got the consistency I wanted, and even then it could have been thicker if I had been more patient.

I dipped the “eraser” side of the wafer into the pink and set them to dry on the lined cookie sheet.

Easy Wafer Cookie Pencils for Back to Homeschool

Then back into the fridge they went.

In the end I could have trimmed the run off of the pink frosting like I did for the white, but I figured the kids wouldn’t mind the extra frosting. 🙂 They turned out so cute and the kids love this little tradition we do for the first day of school (two years in a row establishes tradition around here. Good thing it’s easy.)

Easy Wafer Cookie Pencils for Back to Homeschool

To be honest, I had a dozen other ideas I wanted to do for the first day of school, but it’s a busy time and this is the only one I actually carved out time for. You can find all my fun back to homeschool ideas on my Back to Homeschool Board. I hope you will find some to make your first day of school special… whether you homeschool or not! 🙂

Pin it Button from mamasbrush
Easy Wafer Cookie Pencils for Back to Homeschool

Gathering here.

Whimsical Tree Artwork and borders for Family Tree Record Books

Whimsical Tree Artwork and borders for Family Tree Record Books

I sketched out this whimsical tree illustration last year, but never got to do anything with it. This year when my mom asked me to make a cover for the book she was putting together for her aunt’s family tree, I knew the two would come together nicely. I’m so pleased with how it turned out.

Whimsical Tree Artwork and borders for Family Tree Record Books

My mom has gotten into the whole ancestry.com thing in the last year. She has a lot of time when she can’t do much else than to research online and so it is a good fit for her. And she loves it. I love hearing about it, but the research of it all sounds tedious and awful to me. Maybe it’s the stage of life I’m in.

Whimsical Tree Artwork and borders for Family Tree Record Books

I barely had the energy this time of year to make it pretty for her. 🙂 And though I procrastinated like crazy (I don’t usually want to paint after a day of being outside), I did eventually get it done.

Whimsical Tree Artwork and borders for Family Tree Record Books

She’s putting together a binder of all the information she found about her aunt’s family. She is going to fill in these forms, but wanted them dressed up a bit. Her original request was for me to doodle something in the margin for her to color in. She really wanted to color it herself… I offered to paint it. While we were brainstorming, I asked if she wanted something for the cover.

Whimsical Tree Artwork and borders for Family Tree Record Books

That’s where this was born. I love the way the root tendrils frame not only the title, but also the “researched by” area. And the whimsy of it all just makes me smile.

Have you done any research on your family tree?

Pin it Button from mamasbrush
Artwork and borders for Family Tree Records

Gathering here.

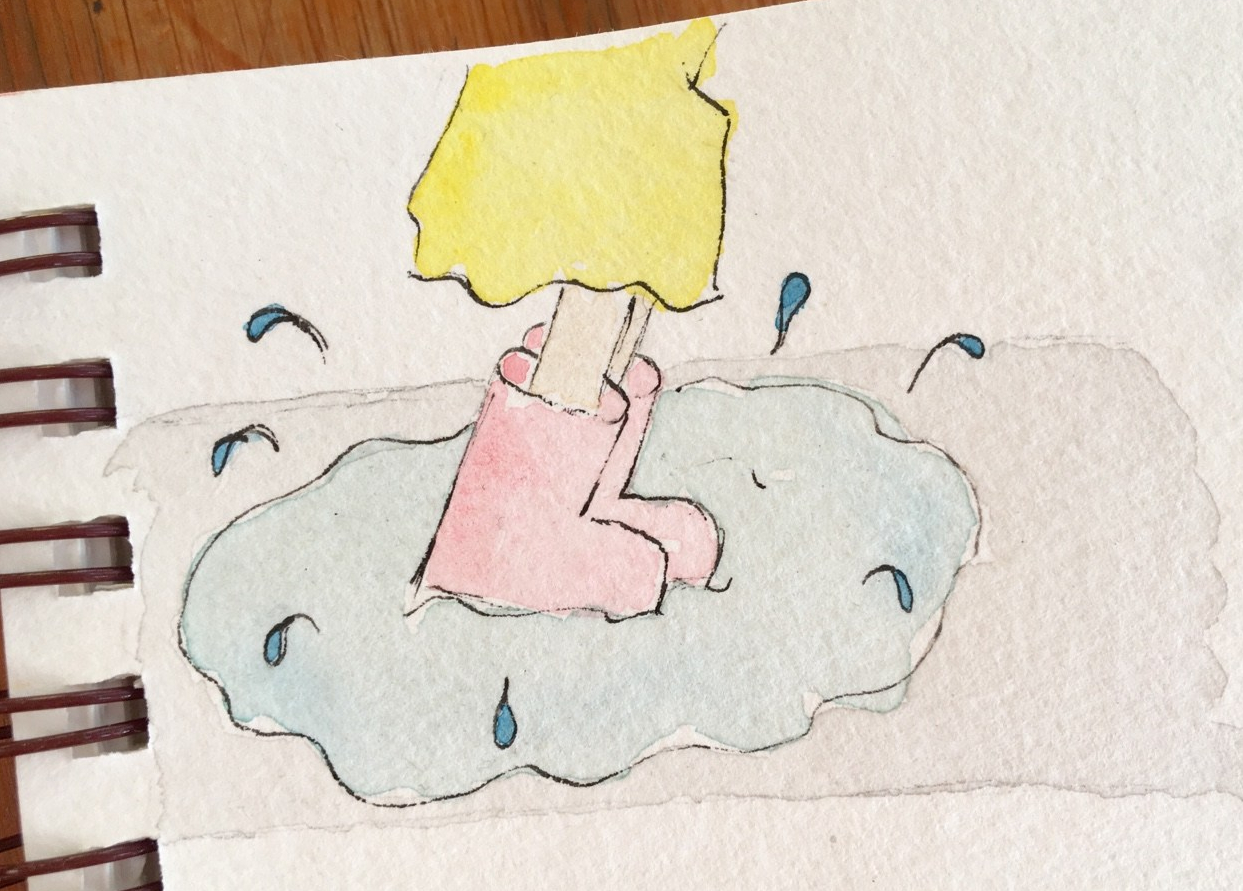
Girl Jumping in a Puddle in my Art Journal

Another installment of my April art journal page.

Illustrating children - Jumping in a Puddle

A few weeks back I told a bloggy friend I follow that I’d be participating in this 100 day project and that I’d be working on illustrating people. Well, I did it a few times and even saw some improvement, but this isn’t a good time of year for me to be promising to do anything everyday. 🙂 I can barely paint at all.
However, while I’m also trying to do a some of the April hand lettering prompts over at Awesome Alice, I decided that this “puddle” prompt should involve at least some of a person. 🙂 So this is my “Little Girl Jumping in a Puddle.”

I love that I can get the playfulness of the moment without a face. 🙂

Pin it Button from mamasbrush
Illustrating children - Jumping in a Puddle

Gathering here.